Airstream Polishing
Levon Register
WARNING:
Polishing is hard work and demands your absolute attention. With high speed tools, working off
ladders, and oxidation dust and grim, it is a MUST to take Safety
precautions. Wear safety glasses,
long pants and long sleeve shirt, leather gloves, breathing mask, and ear
protection.
Stripping
Some airstreams come with a clear coat finish to protect the
aluminum. If your Airstream does
not have a clear coat you can skip this step. You may check if there is a clear coat by putting a small
amount of toothpaste on a rag with your finger and rubbing the skin….if black (oxidation) appears on the rag,
you do not have clear coat. Equipment needed: paint stripper, waste containers,
plastic scraper, paint brush, nonabrasive scrub brush, safety glasses, gloves,
water bucket, baking soda, water hose. Using a paint stripper, brush on surface
and scrape with scraper blade after it bubbles but before it dries out. Wash
and dry. This process usually takes 2 applications, but sometimes even more
because the clear coat was put on thicker in some areas. Once the clear coat is gone, wash each
section with baking soda to neutralize the stripper. This is to prevent the steel components from rusting.
Washing
Pressure wash surface with water and mild detergent.
Buffing
Equipment needed: side grinder/right angle grinder, buffing
wheels, buffing rake, jewelers rouge, abrasive compound, mineral spirits, lots
of rags.
Define a small area you want to polish and stay with that area until you are satisfied with the result you are looking for.
- Start at the rear of the camper. Your Airstream will require more attention to the front of the camper because of the pitting and road debris and will usually take more patience than the rear. Use mineral spirits to clean the surface, especially around the rivets. This process clean the porous metal and brightens the surface.
- Start with one of the 8 inch soft buffs. Depending on the surface condition of the skin, start out using the jewelers rouge by applying the compound to the edge of the buff. Polish the surface using the rouge compound with a side grinder’right angle grinder (3000-4000 rpm range). Polish an 8 inch square section at a time using moderate to light pressure. Work the surface from the left to right direction while moving the buffer upwards. This will keep the surface cool and produce a smoother finish. After each section apply more compound. Lightly overlap the previous section each time.
- After every 4-8 applications with the compound, use the buffing rake to clean out the contamination and soften the buff. (Hang-on tight). You can mount the rake to a board and lean it up against a wall. (This is definitely the dirty part of the process. Use a strong fan to blow away the dust if possible when raking.)
Define a small area you want to polish and stay with that area until you are satisfied with the result you are looking for.
Define your next area you want to
polish and overlap your buffing strokes.
After the first pass, you remove the majority of
oxidation to reveal the stubborn deep down oxidation. Another pass or two will
remove even this.
If a panel has deep pitting or
filiform corrosion (Worming) then start with the grey abrasive and repeat the
above steps (1-3) using a different 8 inch soft buff. The deep pitting will
remain but not as noticeable when cleaned out with mineral spirits. The worming
will buff out with a lot of work as shown in the next photos.
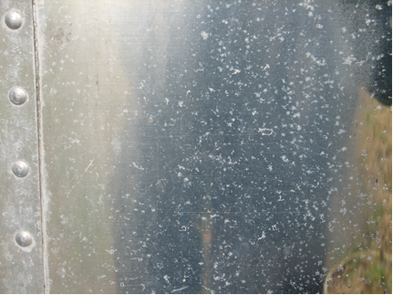
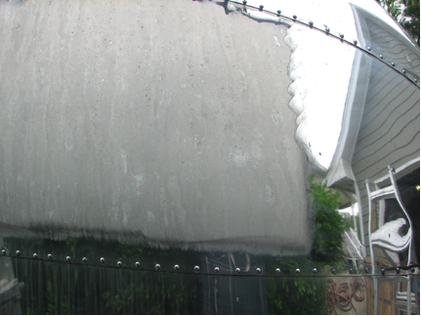
A view of the filiform corrosion
that forms under a clear coat and is hard to remove.
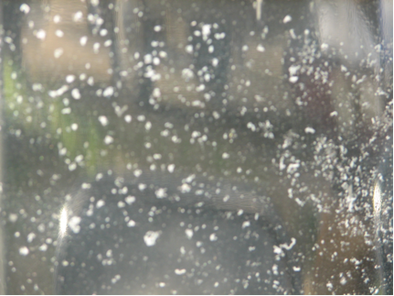
Close up of corrosion. (Worming)
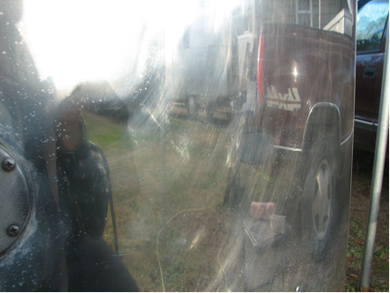
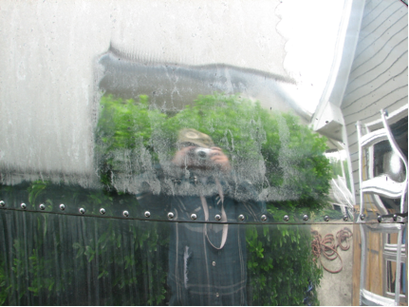
With persistence and a lot of elbow grease (Buffing), these
(Worms) will disappear.
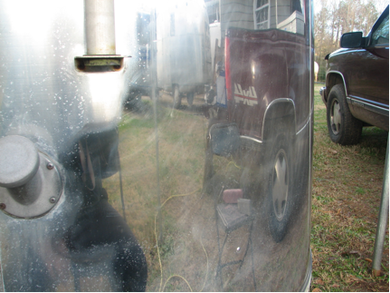
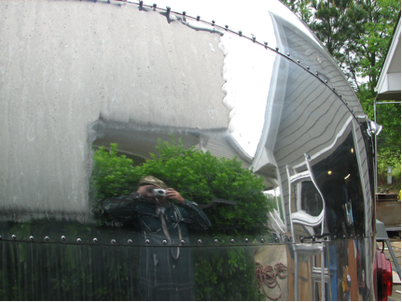
After the worming disappears, buff with the Red
Jewelers Rouge and then a Cyclo
polishing with Nuvite F7 to remove the vertical lines and then use Nuvite S or
some other non cutting polishing paste and it will bring skin to a mirror
shine.
- Use the same process outlined in steps 1-3 with the smaller 4 inch buffs to detail around the windows vents and lower trim areas.
Final Polishing
Equipment needed:
orbital car buffer (prefer cyclo buffer), Nuvite F7, S,
or Metal Armor polish and
soft cotton rags. Buffing with the Red jewelers rouge leaves a
mirror finish but does leave some linear marks or lines. This final step removes the marks and
brightens the surface.
- Using the buffer wrapped in the cotton cloth apply a small amount of F7, S, or Metal Armor polish to the face of the buffer (about the size of a dime). Buff an area about 2 sq. ft. at a time until the polish is about 90% gone.
- Lay a microfiber cloth over the buffer to remove the remainder of polish from surface. This will give you a very deep shine.
Waxing/Sealing
Any waxing or sealing will diminish the mirror shine. If nothing is applied to the finished polishing job, one can keep it a mirror finish with cyclo polishing using a non cutting polish such as Metal Armor or Nuvite S, with minimal time spent.
Notes:
. Mineral spirits, paint stripper and cotton/microfiber rags are available at Wal-Mart/Lowes
. The polishing should not be performed in the direct sunlight. This tends to dry the compound quickly and cause haziness.
. Ensure that the surface remains clean and free from any dirt or contaminants which could scratch the surface.
. Clean buffs regularly with rake, as buffs become glazed over and the buffing surface gets too hard.
. Take care around windows, as excessive heat could crack the glass.
. CAUTION!!! Always wear gloves, eye protection and respirator when buffing!!!
. This is where I purchase my polishing supplies: http://www.jestcoproducts.com/index.php?act=viewCat&catId=4
